With this project, the client instructed us to carry out a full refurbishment. We stripped out everything to include: kitchen; bathroom; old system boiler and hot water storage tank; stripping all wall paper and flooring.
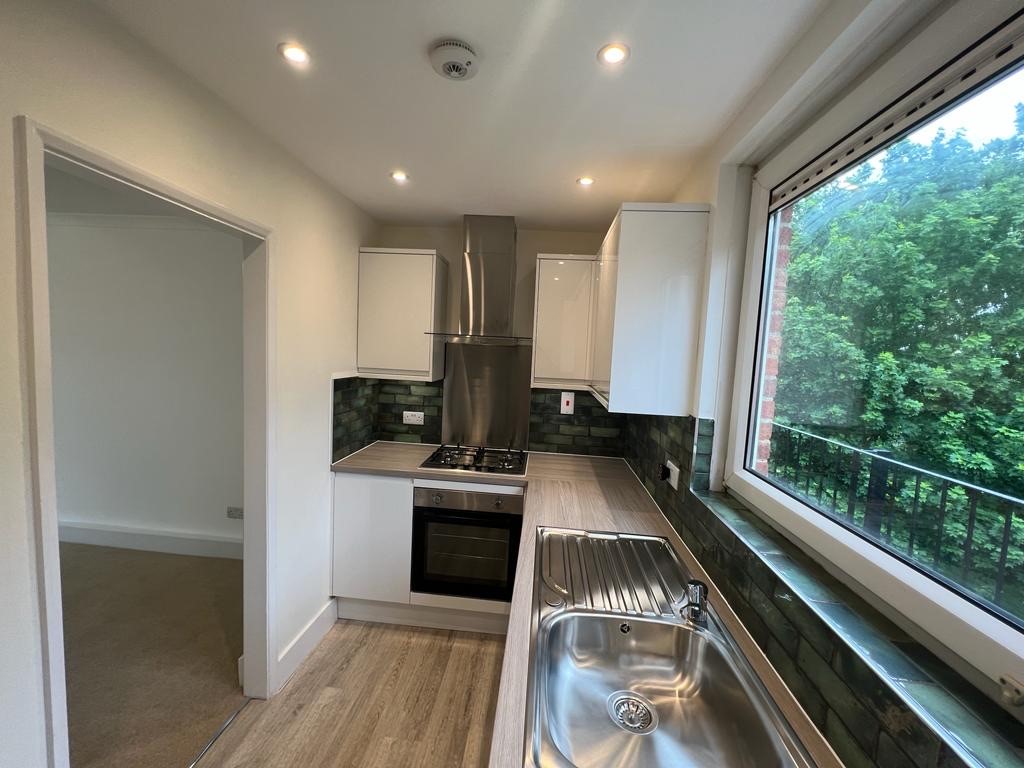
The kitchens the client chose for us to install was from Howdens in Kingston. It was from the “Chilcomb” range in a dark blue and looked very smart. With our help, they decide on a quartz work top and upstand. The “upstand” is the the strip of matching worktop material that sits at the back of a worktop where it meets the wall. Sometimes a client will choose a tiled “splash back” where the wall between the worktop and wall cupboards are tiled to add protection against splashes and stains. It is possible to have an upstand and tiles but we always recommend one or the other. If an upstand is chosen, we paint the wall using a wipeable paint.
We installed an induction hob instead of the original gas hob. Induction hobs, when paired with the correct pans, create an almost instant heat, even quicker than gas and has the added benefit that it has an easy to clean surface.
They also opted for a boiling tap from Quooker for instant boiling water (literally) on tap!
Howdens provided a full design service which is really helpful to fully understand all the clever pull out, swivel, rotating internal pieces available. They don’’t charge for the service and they also provide a great CAD image to help clients visualise the end result.

The installation took a little longer than planned as all the walls needed straightening out. It may look to the untrained eye, that your rooms have flat, square walls. This wasn’t the case in this instance. There are two option available, Firstly you can “dot & dab” plasterboard to the walls. This is quick & easy and an unskilled job. It’s a good way of getting flat walls but not a good wall to then fix cabinets to. The second, and we believe, the best solution is to “bond’ the walls using a bonding plaster or “hardwall” plaster allowing us to get the wall flat before adding the final “finishing plaster” coat. We then had a really strong base for fixing the wall cabinets to.
The finishing touches came from a rather expensive quartz work top and some rather nice feature lighting.
The boiler we found was the traditional and slightly old fashioned system boiler with separate hot water tank. Because this was only a two bedroom flat with one bathroom, we proposed a combi boiler as an alternative. The advantages are two fold. Firstly, a combi boiler does not require a separate hot water tank and secondly it is cheaper. A combi boiler heats the water on demand and thus frees up a whole cupboard space where the old tank lived. We did have to run a new flue and a lot of shiny new copper pipe work but the space we created was profound for a small flat.
All the boiler work was carried out by a Gas Safe engineer and certificated.

The same goes for the electrical work. The flat did not require fully re-wiring, however, the consumer unit or “fuse board’ as it’s more commonly known, was very old and unsafe. This was installed by our fully qualified (NEICIC 18th Edition) electrician. It’s a relatively simple procedure that does not require huge disruption.
All of the walls were covered in the old wood chip wall paper. That had to be steamed and stripped before all the walls, and ceilings were re-plastered. Some of the ceilings were in a very poor state. To prevent any future cracking of the newly plastered ceilings, we over boarded where necessary. This simply requires a thin plaster board screwed over the original ceiling to provide a solid base on which to skim coat.
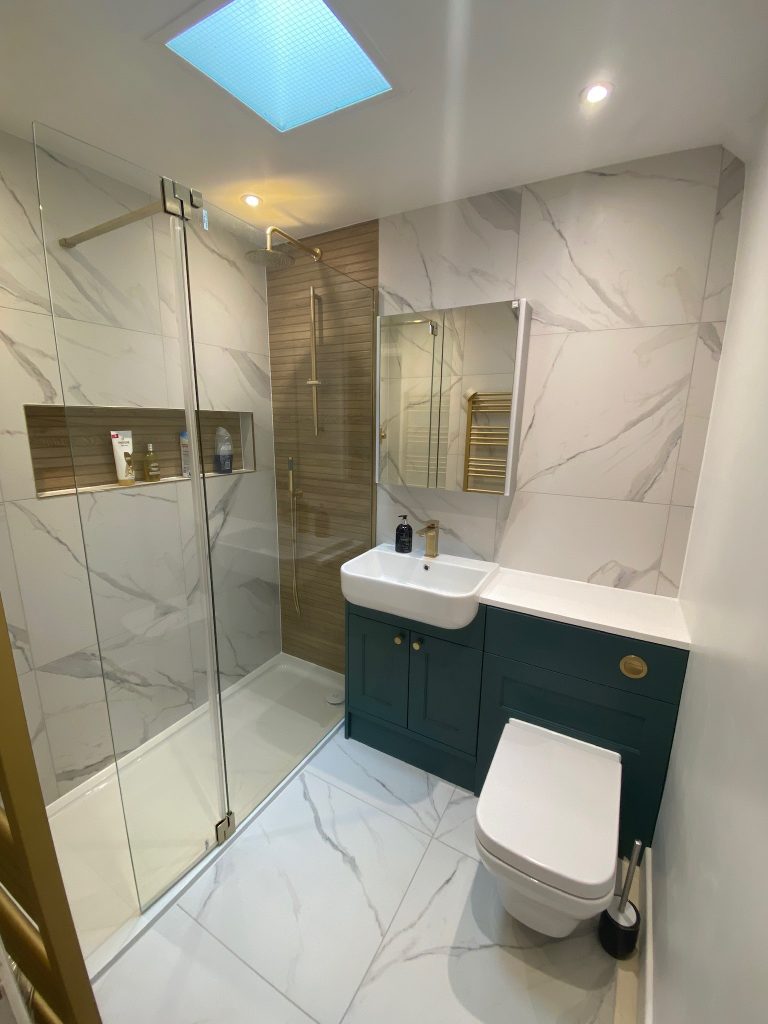
The client decided that the old bath in the bathroom was not required so we decided we would create a luxury wet room. I would normally advise against a wet room floor as without the most solid of substructures, they do not deal very well with movement. In this instance as the floors were concrete and the drainage was in the right place, a tiled wet room floor was achievable.
We tiled all of the walls and floor in a porcelain tile and were able to create a recessed “ niche” in the shower area to store shampoo bottles etc. We even squeezed in an LED feature light which was a nice finishing touch. A fixed shower screen and fix shower head with hand held attachment looked really sleek and simple. When painting the ceiling we used a wipeable, mould resistant paint, which is the only suitable paint for a wet area. Again a qualified electrician is required when fitting new circuits for a bathroom and should usually be certificated.
The most common flooring finish we see these days is Luxury Vinyl Tiles (LVT). The main brand is Amtico and is often seen in commercial situations. It is extremely hard wearing, a really high quality finish and is suitable throughout, including kitchens and bathrooms. When we stripped out the carpets and removed all the gripper rods we basically had a nice, solid, level concrete floor to work from. The fitters were able to lay a this levelling compound over the whole area and lay the flooring on top. The uniformity of having the same flooring throughout the flat, really improved the feeling of space. Having the same finish throughout also simplifies the often over fussy look of multiple different finishes. Traditionally, one would expect to see carpet, laminate and tiles depending on the room. By having a single finish it really adds to a overall feeling of space.
The only thing we would do was choose the colours to paint the walls. However, we are always happy to throw an opinion in (which we did in this case!)